Support Tickets and ChatUpdated 7/10/2026· Published 7/1/2026· 0 views
Raise a support ticket
Create a tracked ticket when you need a human to follow up on an issue.
By Administrator
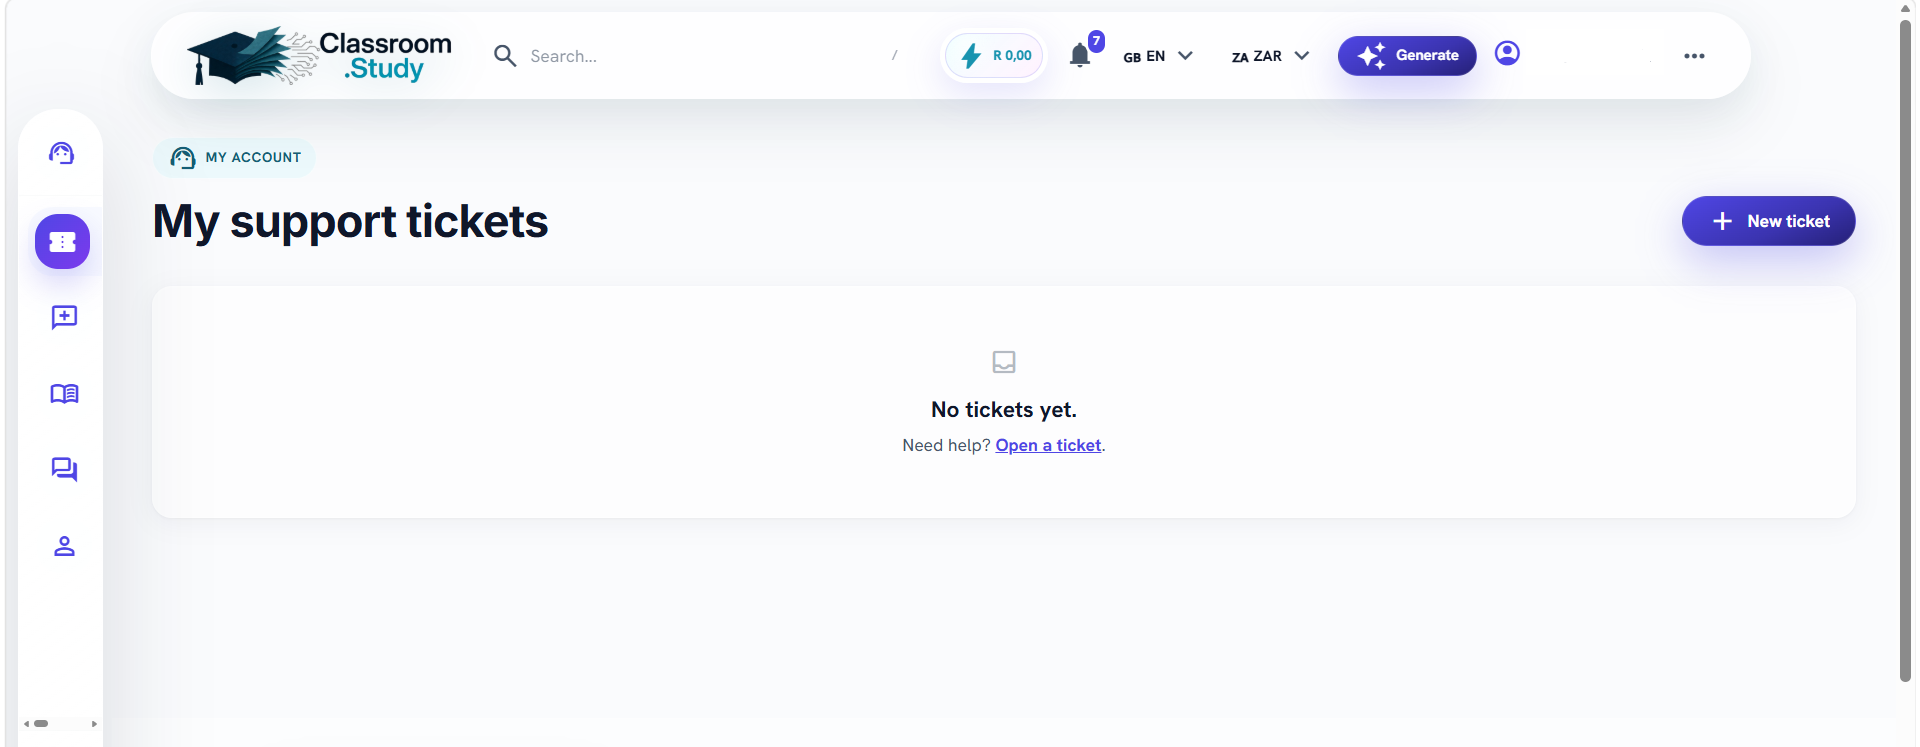
Support Tickets and Chat
Raise a support ticket
Create a tracked ticket when you need a human to follow up on an issue.
What this function does and why it matters
Raise a support ticket is part of the Support Tickets and Chat workflow in ClassRoom.Study. The function exists to help the right stakeholder move from intention to action without guessing which page, button or record controls the outcome. Create a tracked ticket when you need a human to follow up on an issue. In daily use this means a learner can understand what to do next, a creator can prepare learning material with fewer support questions, a company admin can manage people and evidence with a cleaner audit trail, and a platform admin can see whether the process is working at scale. For users, support manuals show the fastest route to help: self-serve the assistant, then raise a tracked ticket with attachments when a human is needed. For support teams, structured tickets and escalation keep evidence and ownership clear.
The benefit is not only convenience. This area protects operational consistency. It makes status visible before a person acts, keeps related records connected, and gives teams a repeatable way to train new users. When a company has many learners, courses, invoices, schedules or live sessions, small navigation mistakes become expensive. A clear manual gives every person the same mental map: where to start, what to check, what each control changes, and what proof should exist after the action is complete. Use this page as the plain-language reference when onboarding new staff, answering support tickets, checking compliance, or preparing screenshots for a branded internal guide.
Benefits and features
Creates a trackable record the team can action.
Lets you add detail the assistant could not resolve.
Gives you a number to reference later.
Visual flow
The high-level path from start to finish. Each box is a stage; the arrows show the order. Use this as a quick mental map before the detailed steps below.
Support → New ticket
→
Describe
→
Attach
→
Submit
Mind map
The feature at the centre, with the related toggles, settings and sub-controls branching out. Use it to see everything this area touches at a glance.
Support ticket
◆Include
Category
Clear description
Attachments
◆Get
Ticket number
◆Then
Track status
Upload a screenshot for the Raise a support ticket overview here.
Video placeholder
In Admin Settings > System Manuals, edit this article and use the video button to paste a YouTube URL. The saved article will render the video inline for visitors.
Step-by-step navigation
Follow the steps in order the first time. After you understand the flow, you can jump directly to the control you need. For training purposes, replace every screenshot placeholder with the exact screen your users will see in production, including the correct company, role or learner context.
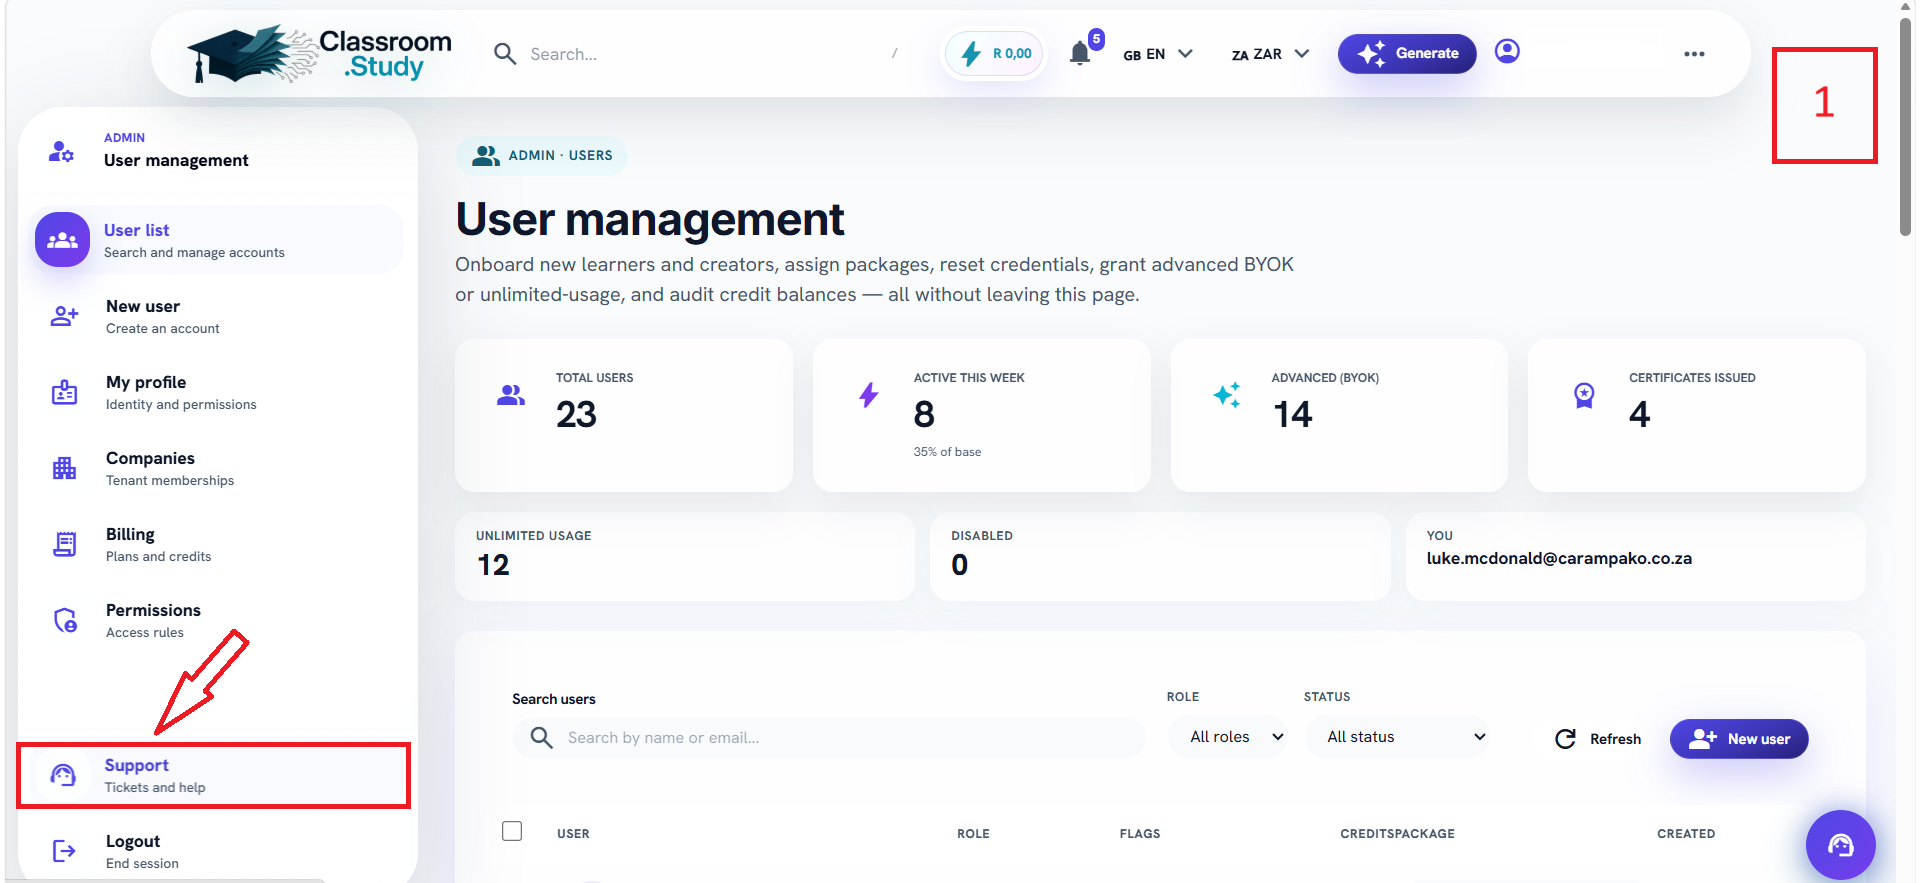
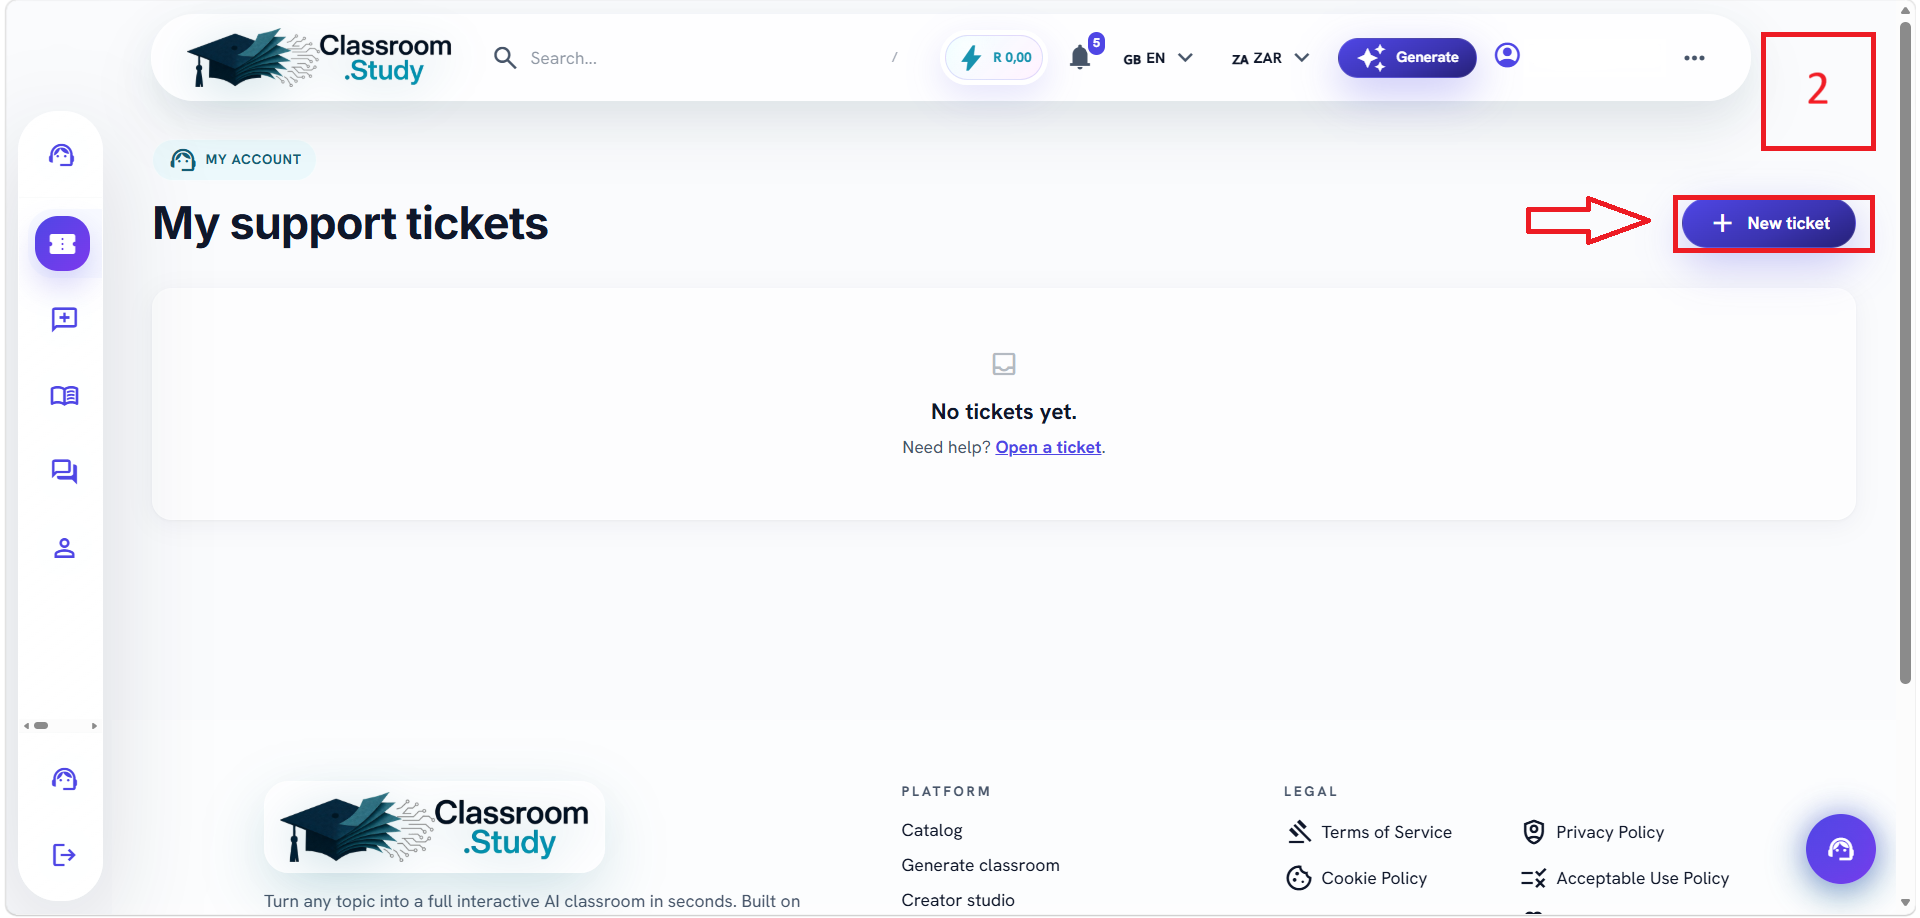
Step 1: Open Support → New ticket.
Step 2: Pick a category and describe the issue clearly.
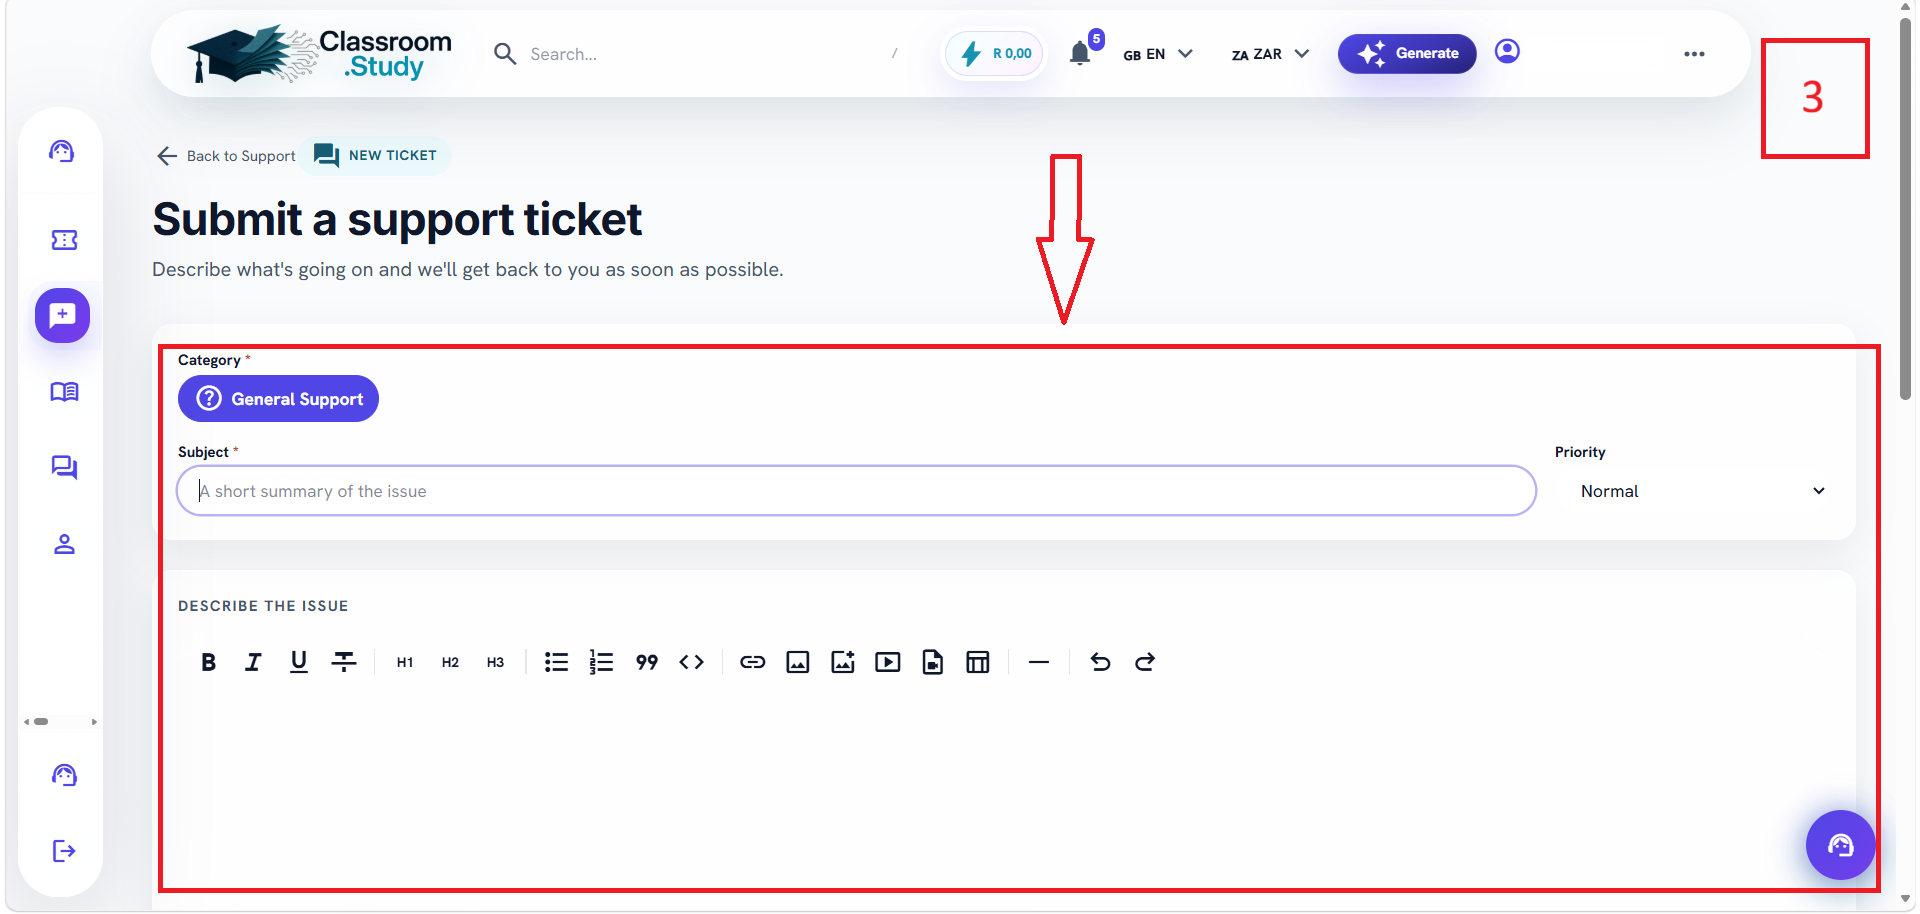
Step 3: Attach screenshots or files if helpful.
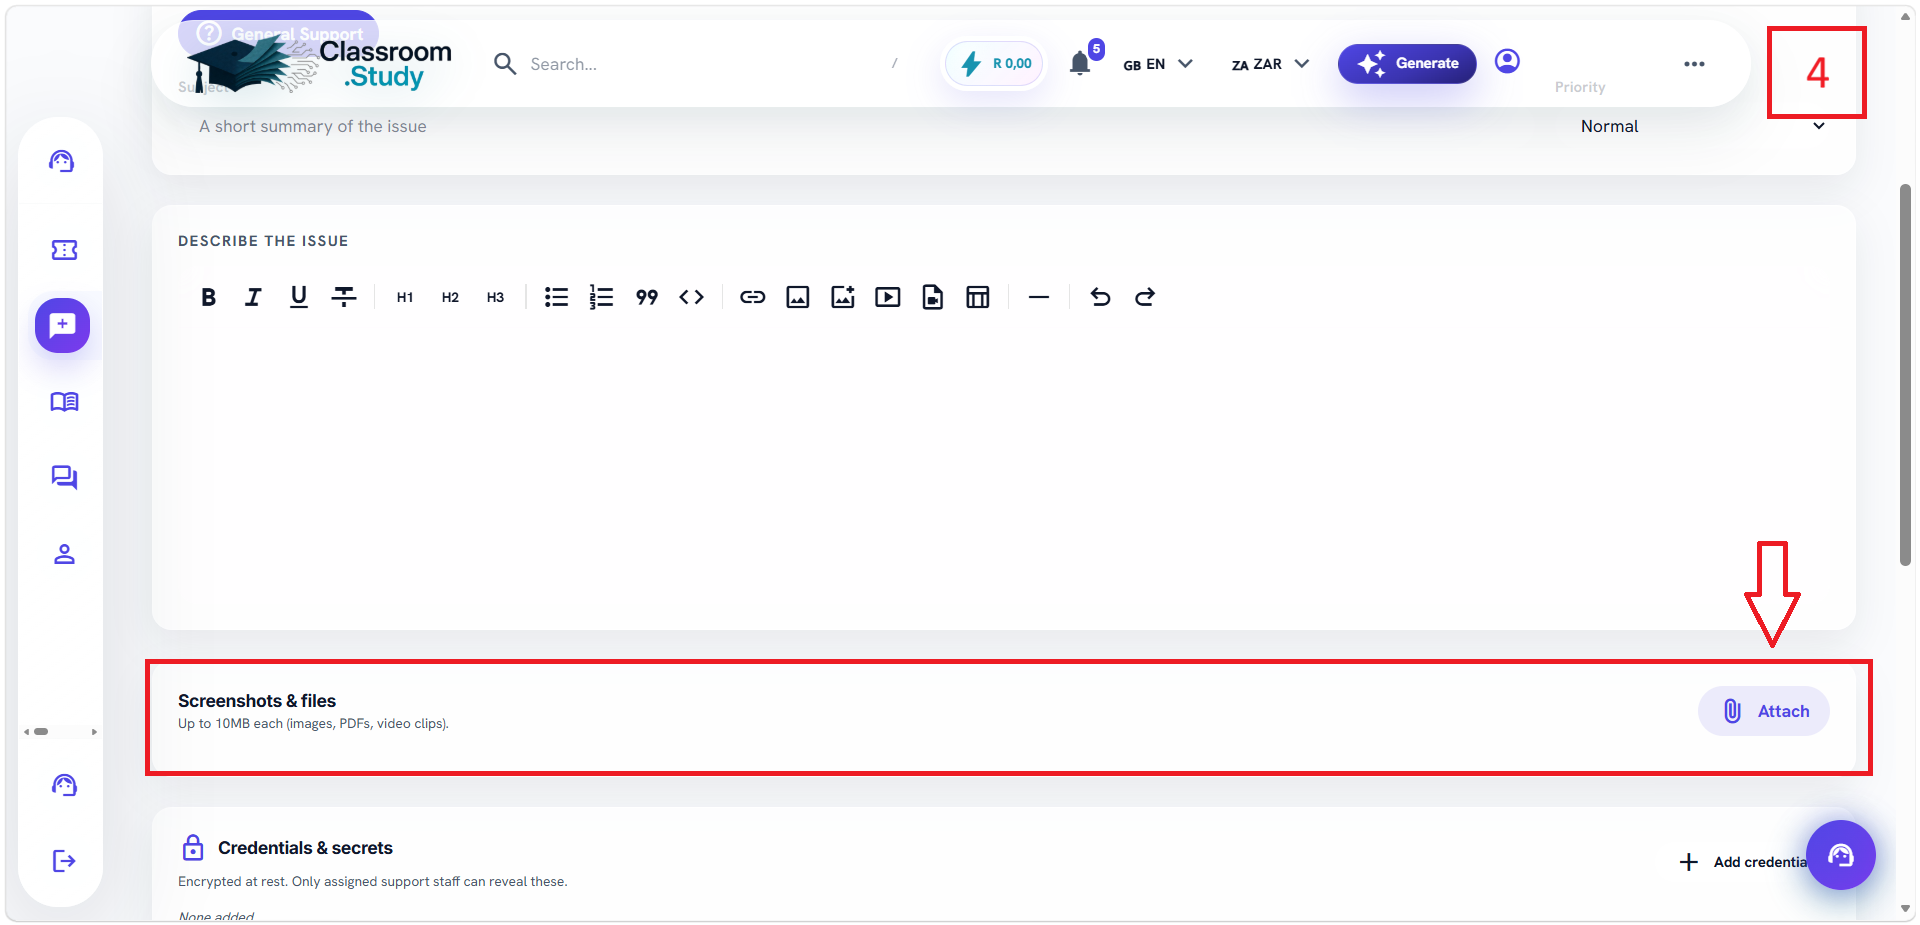
Step 4: Submit and note the ticket number.
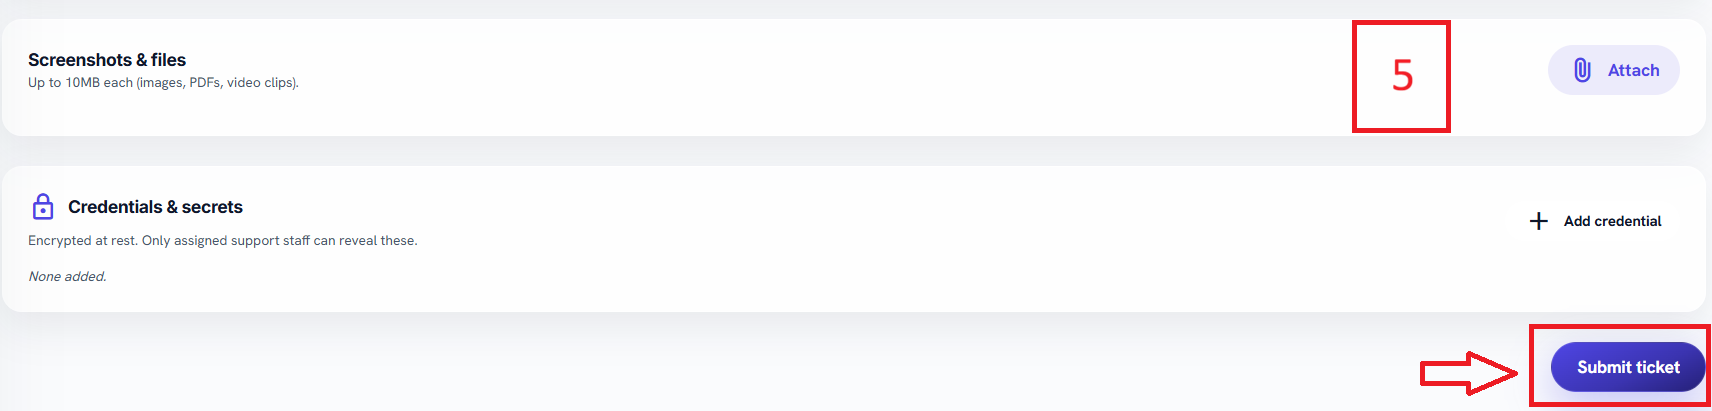
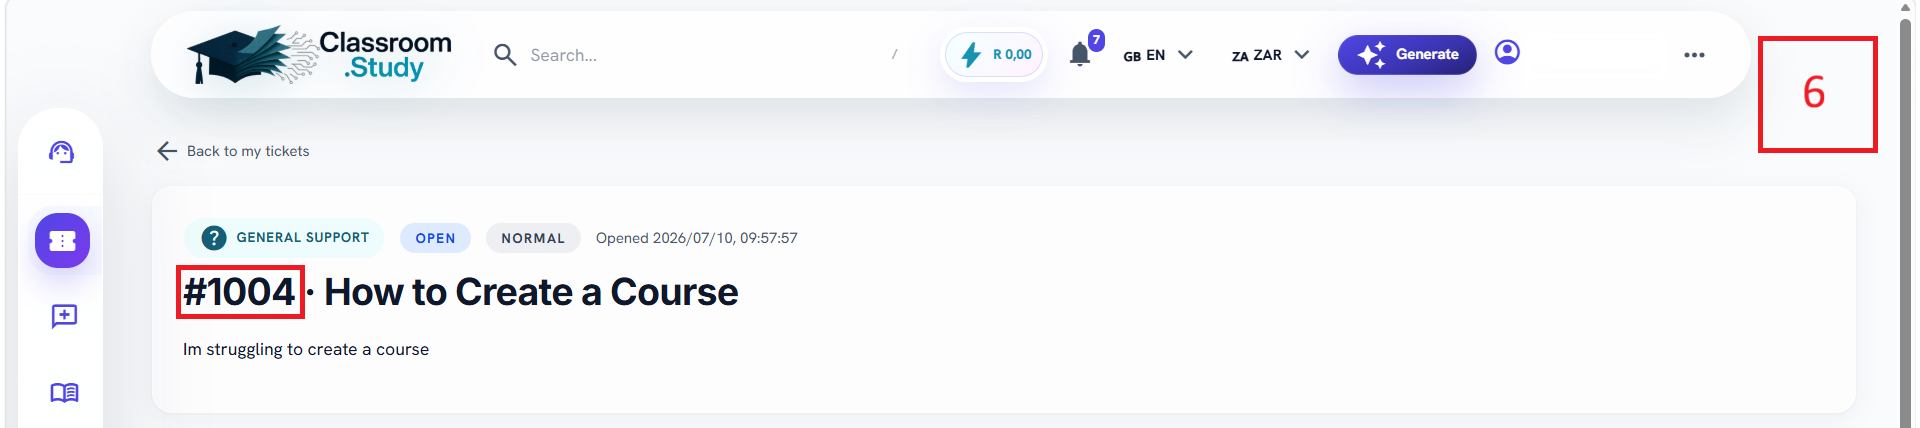
Good operating habits
Work from the smallest panel that gives you the control you need, confirm status chips before acting, and use exports or detail pages when you need an audit trail. If an action changes billing, access, certificates, AI usage, invitations, public content, or live session attendance, pause long enough to confirm the company, learner, course and date context. Add notes where the interface provides them. Use filters before exporting so the exported CSV answers a specific question. When training a novice, ask them to say what changed after each step; if they cannot explain the result, they should return to the record and check the status, timestamp, or linked activity before moving on.
Was this article helpful?
Related articles
Ask the in-app support assistant
Use the support chat to get instant, step-by-step help grounded in the system manuals.
Track a ticket status
Follow your ticket through open, assigned, pending, resolved and closed states.
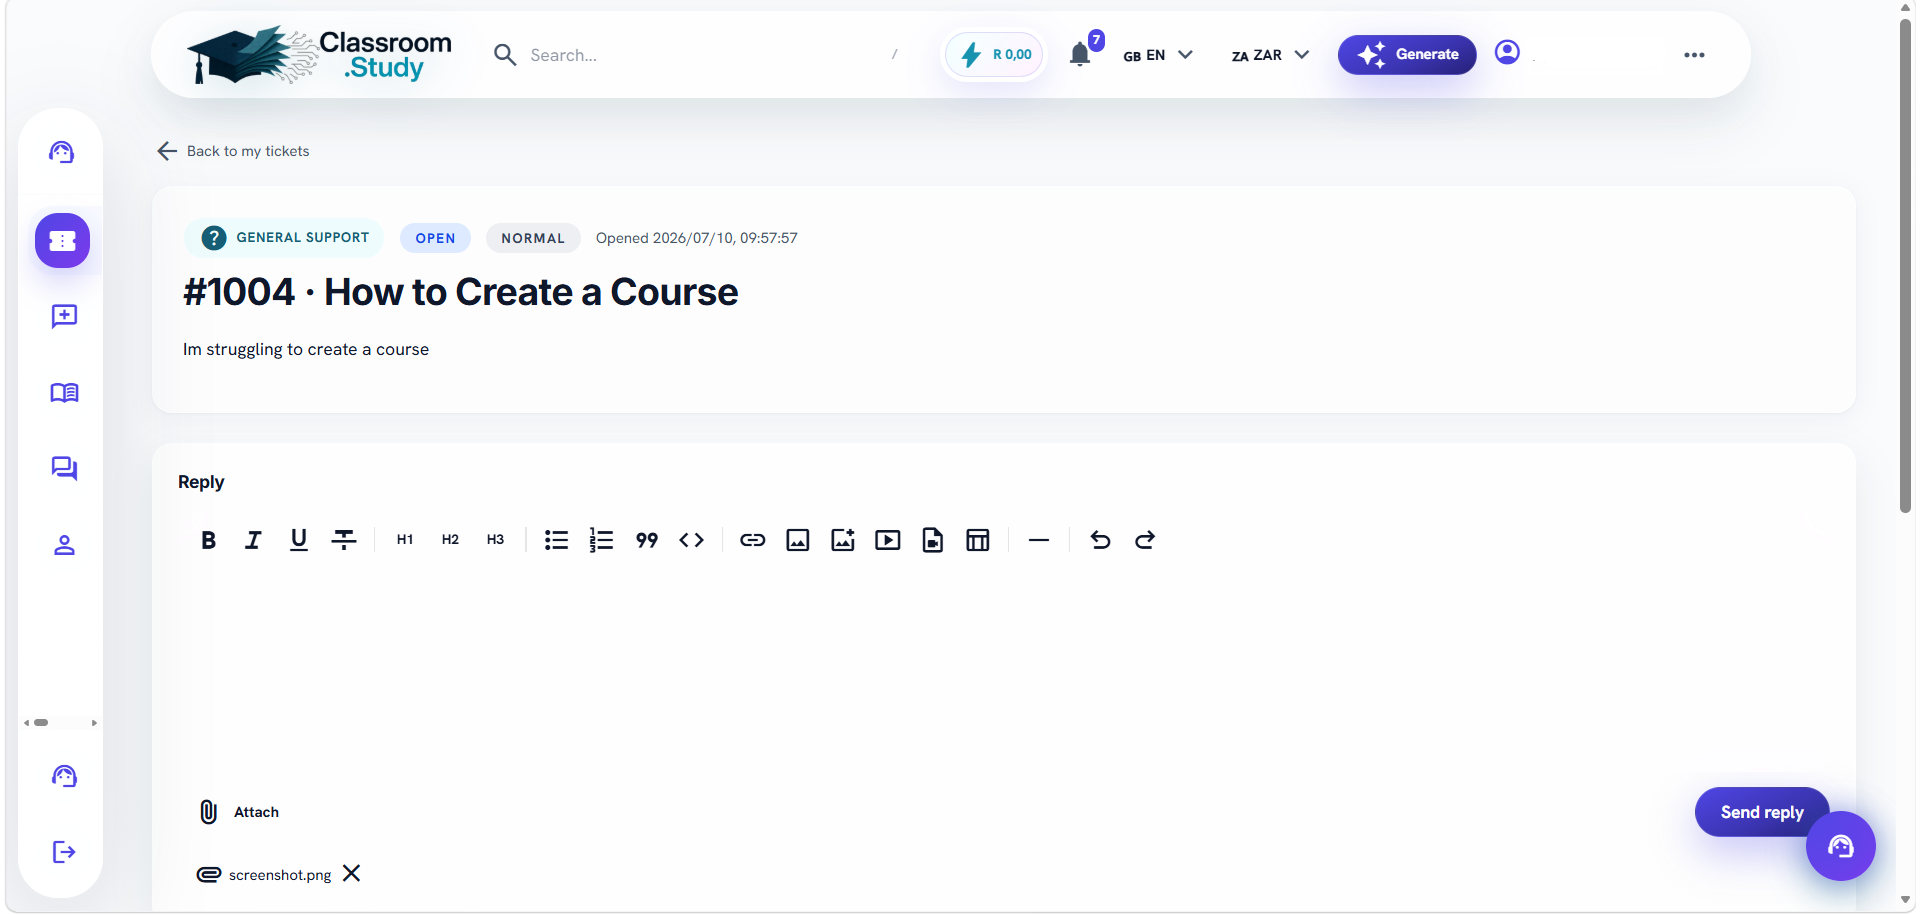
Add attachments to a ticket
Upload screenshots or files so support can see exactly what you see.